 EN
EN


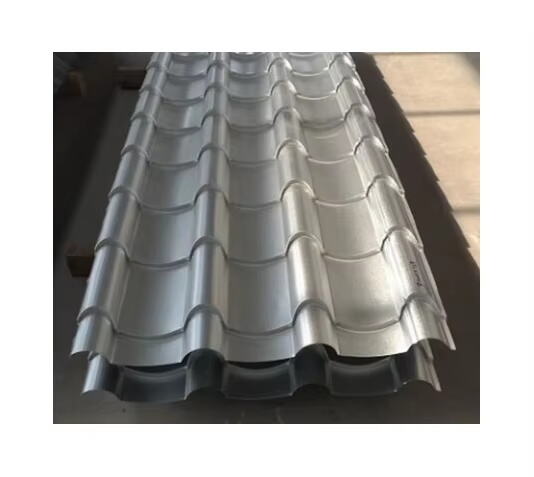
Galvanized corrugated sheets are a fantastic option for your roofing or walls. They’re tough, long-lasting, and budget-friendly. Whether you’re tackling a DIY project or hiring help, understanding the right installation methods ensures a smooth process. These sheets also add a sleek, industrial look that works for homes or commercial spaces.
Preparing the Structure for Installation Methods
Inspecting and Cleaning the Surface
Start by inspecting the surface where you’ll install the sheets. Look for any damage, uneven spots, or debris. If you’re working on a roof, check for loose shingles or rotting wood. For walls, make sure the surface is smooth and free of cracks.
Once you’ve inspected, clean the area thoroughly. Use a broom or brush to remove dirt, dust, and any loose particles. If there’s grease or stubborn grime, a mild detergent and water can help. A clean surface ensures the sheets adhere properly and prevents future issues.
Measuring and Marking for Accuracy
Accurate measurements are key to a successful installation. Use a measuring tape to determine the dimensions of the area. Write down the measurements and double-check them to avoid mistakes.
Next, mark the spots where the sheets will go. Use chalk or a marker to draw guidelines. These lines will help you align the sheets correctly during installation. Don’t skip this step—it saves time and prevents misalignment later.
Prepping the Frame or Support Structure
If your project requires a frame or support structure, now’s the time to prepare it. For roofs, ensure the rafters or trusses are sturdy and evenly spaced. For walls, check that the studs or framing are secure and level.
If needed, reinforce weak areas with additional wood or metal supports. This step is crucial for holding the sheets in place, especially in areas prone to strong winds or heavy rain. A well-prepped frame makes the rest of the installation process much easier.
Step-by-Step Installation Methods
Measuring and Cutting the Sheets
Start by measuring the area where you’ll install the sheets. Use your measuring tape to double-check the dimensions. This ensures you cut the sheets to the correct size. Once you’ve got your measurements, mark the cutting lines on the sheets with chalk or a marker.
For cutting, use tin snips for small adjustments or a circular saw with a metal blade for larger cuts. Always cut on a stable surface to avoid mistakes. Wear gloves and goggles to protect yourself from sharp edges and flying debris. Take your time—precision here will save you headaches later.
Overlapping and Laying the Sheets
When laying the sheets, overlap them to create a watertight seal. A good rule of thumb is to overlap each sheet by at least one corrugation. For roofs, make sure the overlap follows the slope to allow water to flow off easily.
Start at the bottom edge and work your way up. This layering method prevents water from seeping under the sheets. Align each sheet carefully with your marked guidelines to keep everything straight.
Fastening with Screws or Nails
Secure the sheets using screws or nails with rubber washers. Place fasteners along the ridges of the corrugations to prevent water pooling. Space them evenly, about 12 inches apart, for a firm hold.
Use a cordless drill or screwdriver to tighten the screws, but don’t overtighten. This could damage the washers or the sheets. Check each fastener as you go to ensure a snug fit.
Adding Flashings, Sealing, and Waterproofing
Install flashings along the edges, corners, and ridges to protect against leaks. These pieces act as barriers where sheets meet other surfaces. Use screws to secure the flashings, and apply a waterproof sealant along the seams for extra protection.
For roofs, pay special attention to valleys and ridges. These areas are prone to leaks, so seal them thoroughly. A little extra effort here goes a long way in keeping your structure dry.
Final Inspection and Adjustments
Once everything is in place, inspect your work. Check for gaps, loose fasteners, or misaligned sheets. Make any necessary adjustments to ensure a tight, secure fit.
Walk around the structure and look for areas that might need extra sealing. If you’re working on a roof, test for leaks by spraying water over it. A final inspection ensures your installation methods deliver a durable and professional result.
Tips for Effective Installation Methods
Ensuring Proper Alignment and Overlap
Getting the alignment and overlap right is crucial for a polished and durable finish. When laying the sheets, always follow your marked guidelines. This keeps everything straight and prevents gaps. Overlap each sheet by at least one corrugation. For roofs, align the overlap with the slope to help water flow off easily.
Here’s a tip: Use a level to double-check as you go. Even a slight misalignment can cause issues later. Take your time with this step—it’s worth it.
Avoiding Common Mistakes
Mistakes during installation can lead to costly repairs. One common error is cutting the sheets too short. Always measure twice before cutting. Another mistake is overtightening screws. This can damage the rubber washers and compromise waterproofing.
Skipping safety precautions is another big one. Don’t rush or ignore your protective gear. Working on a roof? Make sure your ladder or scaffolding is stable. A little extra caution goes a long way.
Installing galvanized corrugated sheets doesn’t have to be complicated. With the right tools, careful preparation, and attention to detail, you can create a durable and watertight finish.
